How to Troubleshoot and Fix Common Oil Heat Issues
Imagine waking up to a cold house on a freezing winter morning. Your furnace has stopped working overnight, leaving you and your family shivering. These moments can be frustrating and stressful, making you need warmth more than ever.
Don’t worry. Many common heating problems have simple fixes you can try yourself. This guide will show you how to handle the most frequent issues with fuel-powered systems.
We’ll cover everything from pilot light problems to fuel level checks and filter maintenance. Our step-by-step guide helps you find issues quickly and safely. You’ll learn when to fix things yourself and when to look for oil heat repair near me.
With over 125 years of HVAC experience, we offer 24/7 service to keep your home warm. Our knowledge helps homeowners save time and money with proper maintenance and smart troubleshooting.
Key Takeaways
- Most heating issues have simple causes like clogged filters or low fuel levels
- Regular maintenance prevents 80% of common furnace problems
- Safety should always come first when working with fuel systems
- Professional help is needed for complex electrical or mechanical repairs
- Proper troubleshooting can save hundreds in unnecessary service calls
- Emergency services are available 24/7 for urgent heating failures
Understanding Your Oil Heating System Components
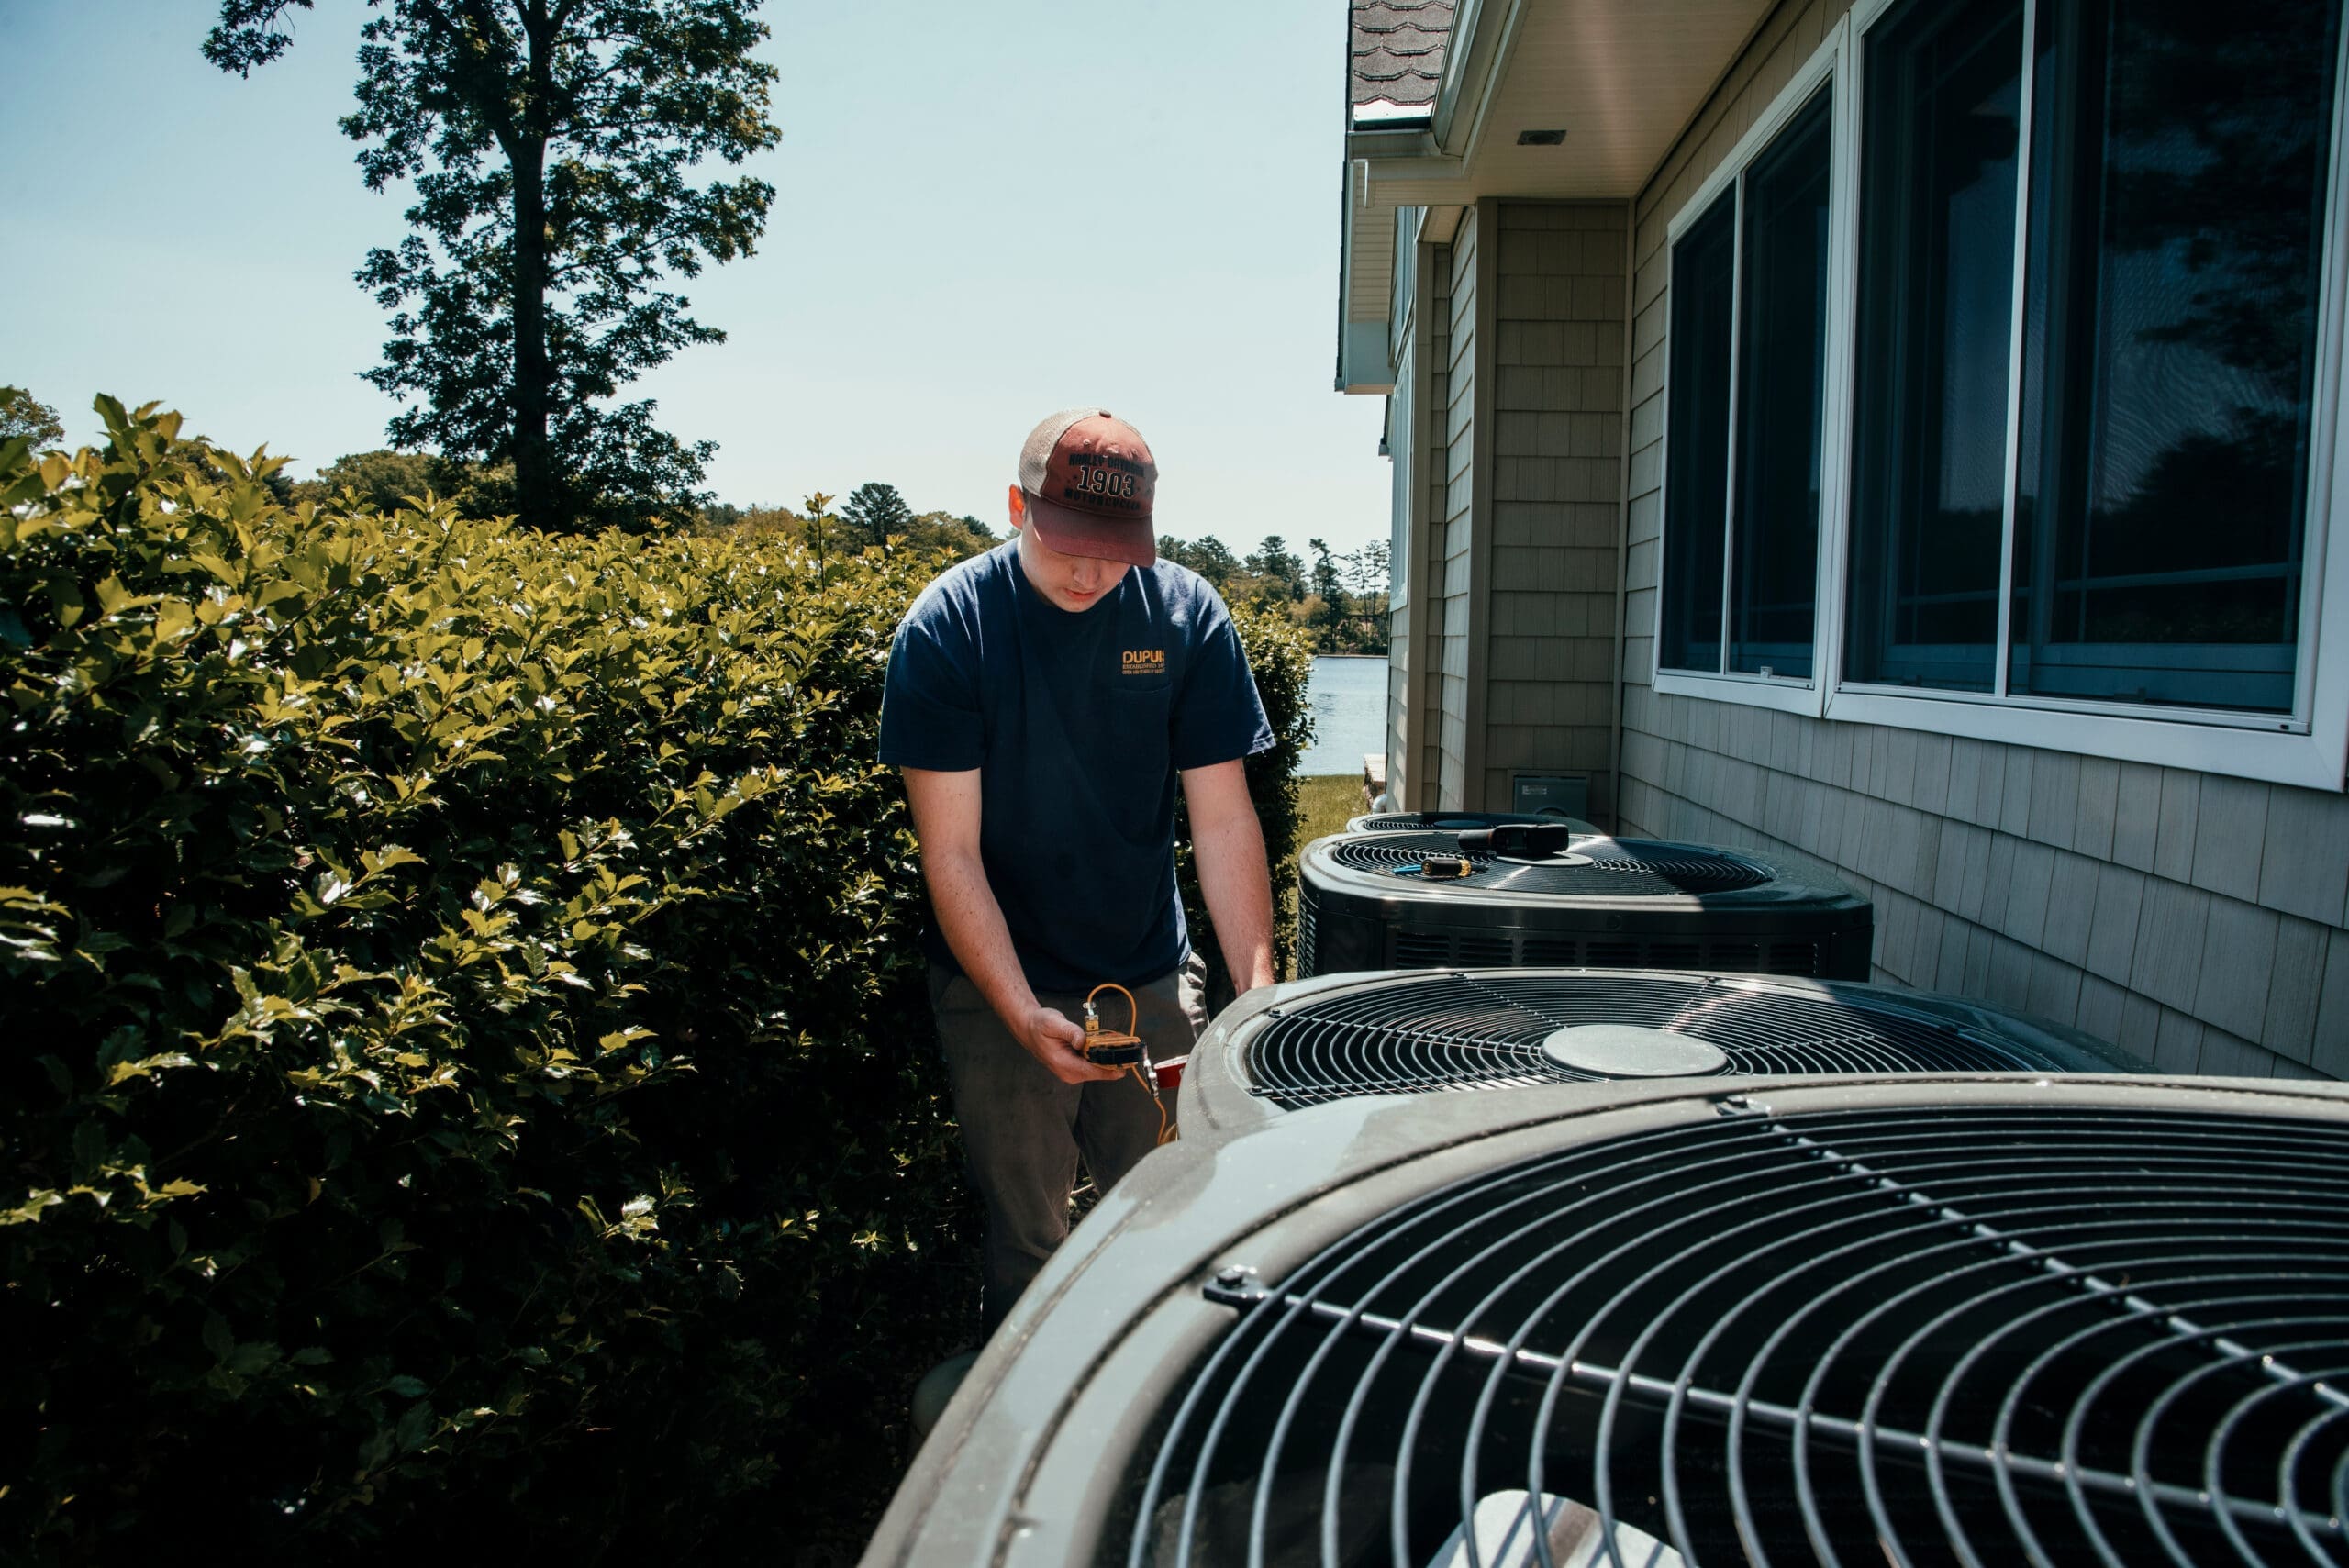
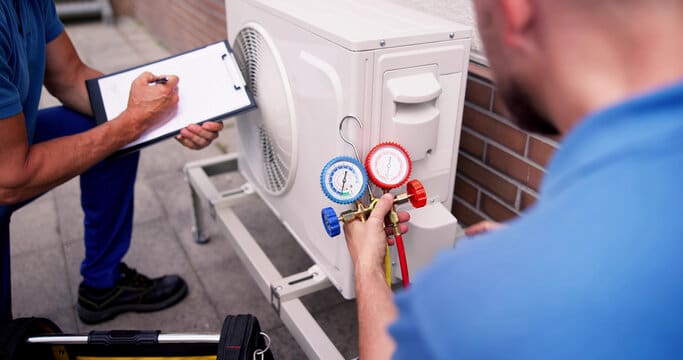
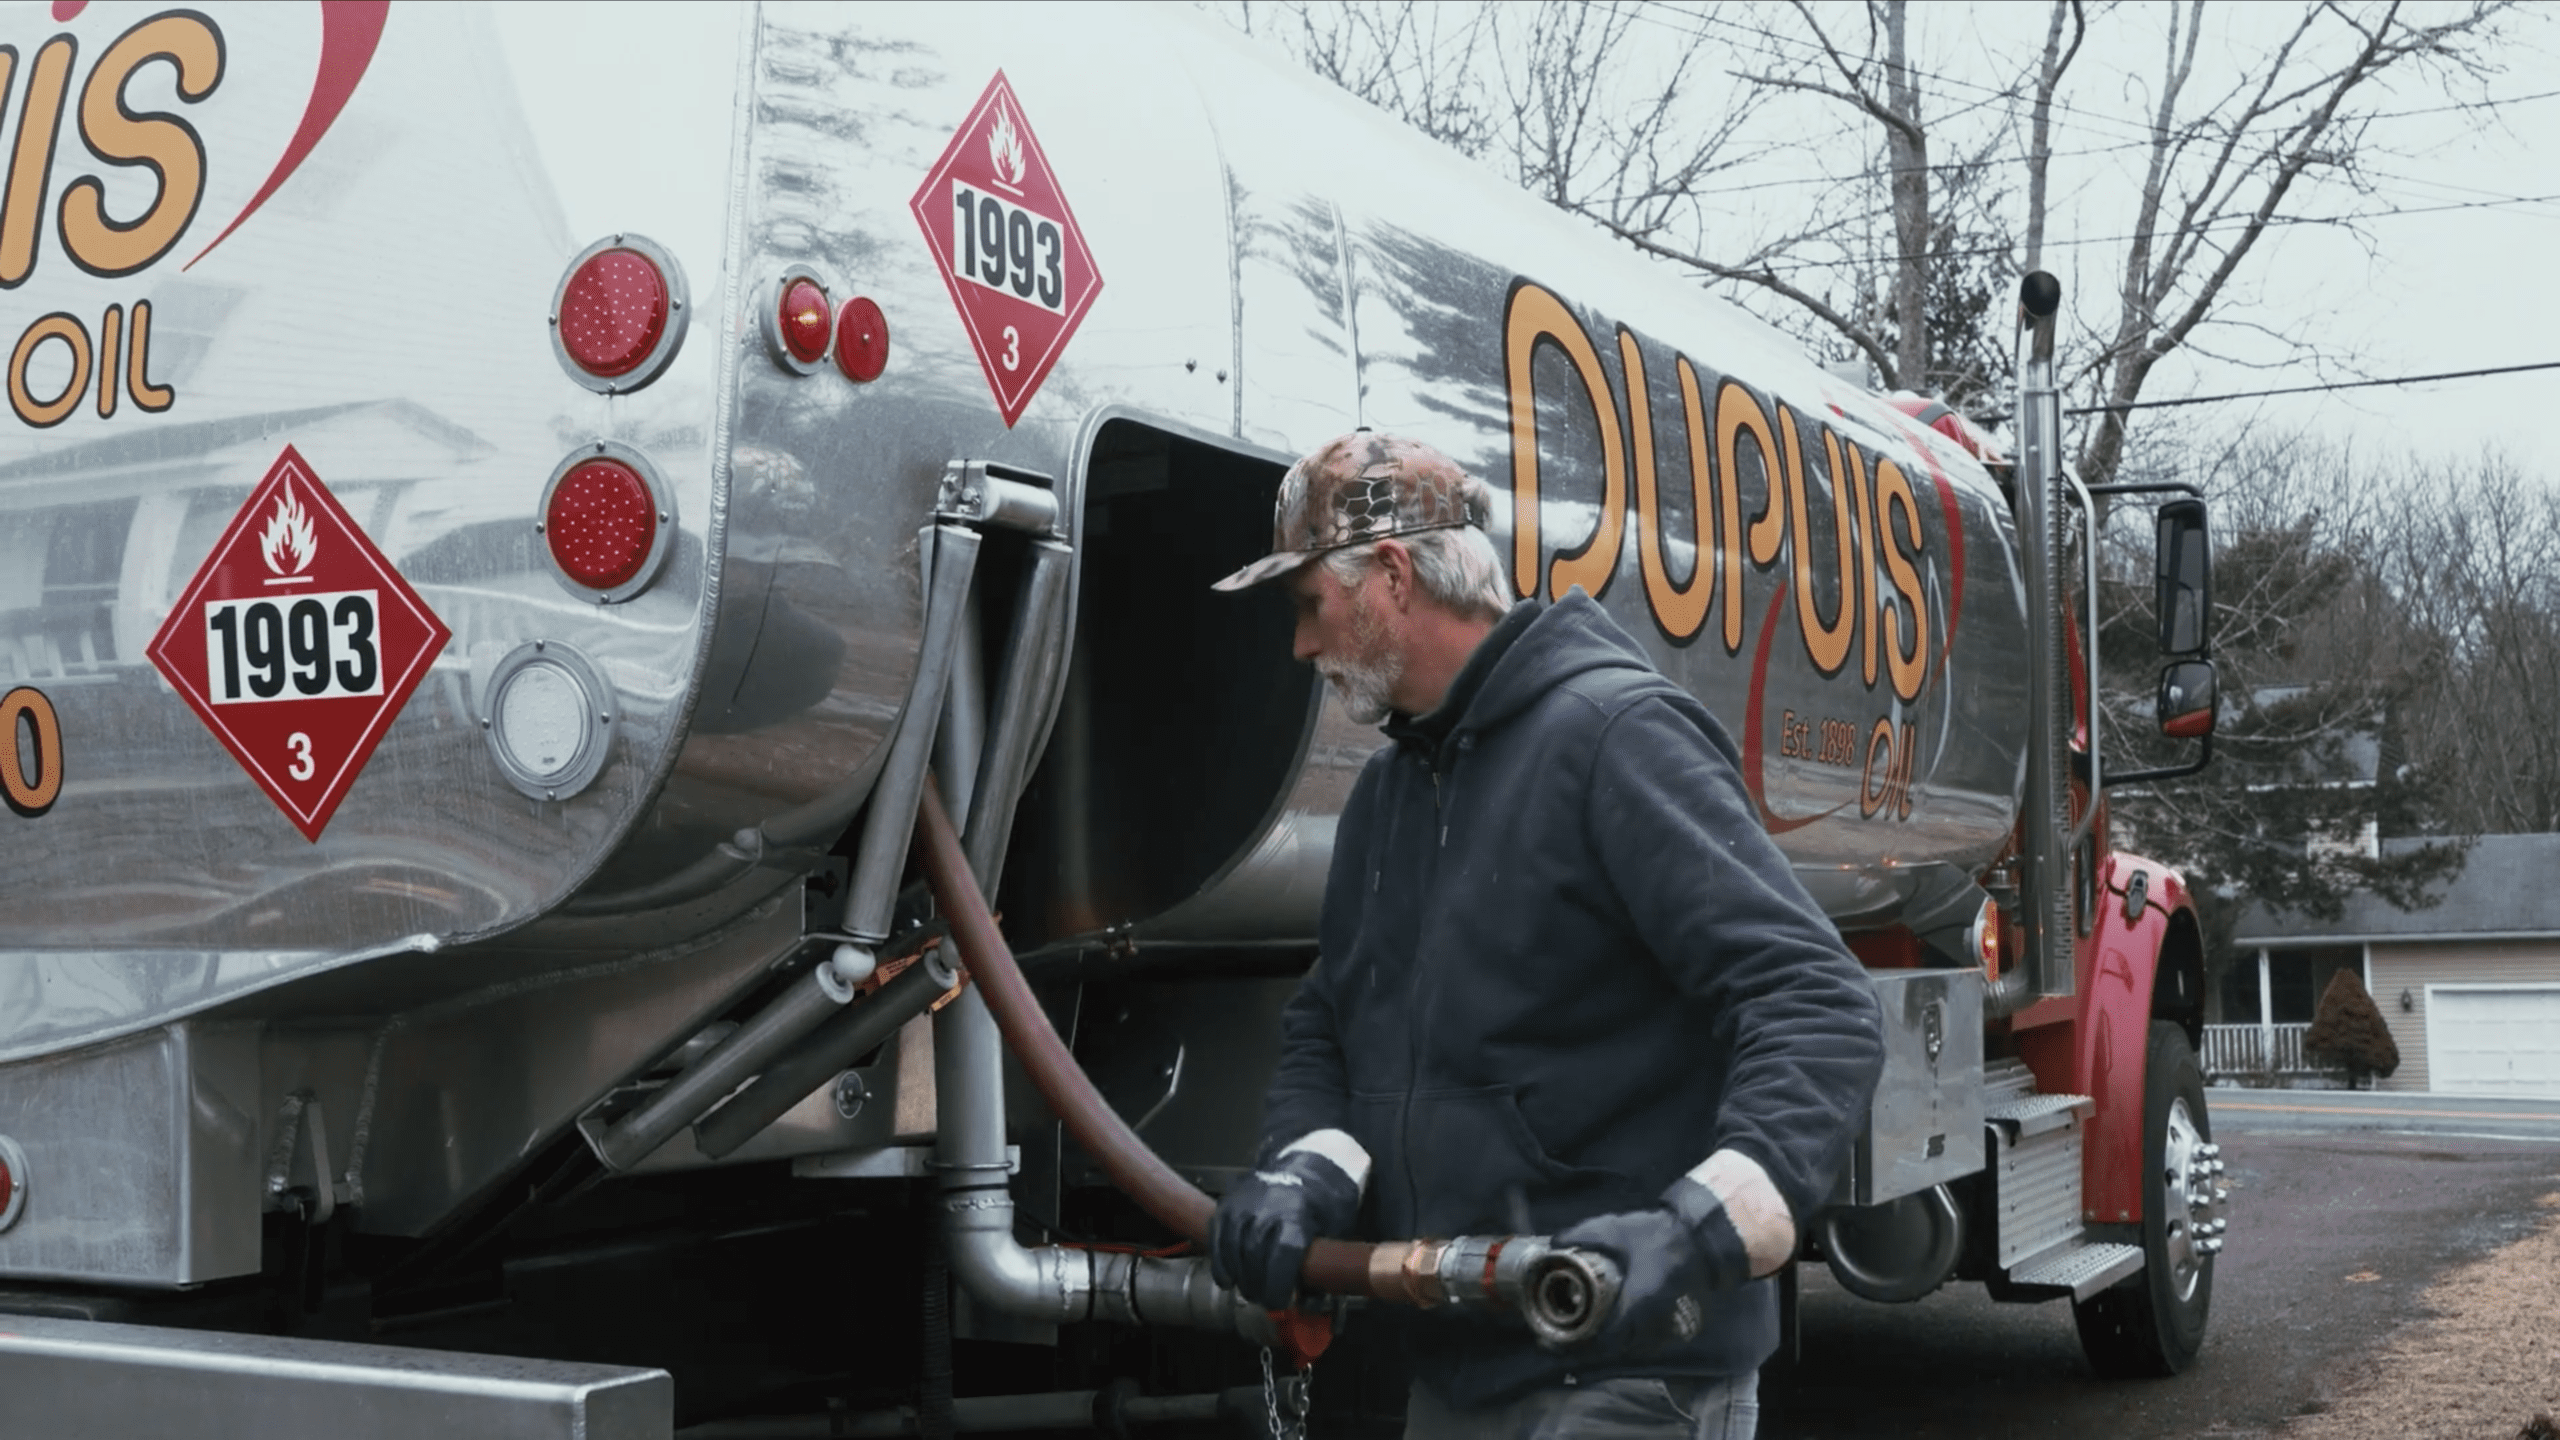
Your oil heating system has many parts that work together to keep your home warm. Knowing these parts helps you spot problems quickly and talk better with service techs. Companies like Dupuis Energy are experts in heating system service, but knowing the basics helps you too.
Learning about your heating system’s main parts makes oil burner maintenance and troubleshooting easier. Each part has a special role in turning heating oil into warmth for your family during cold months.
Oil Burner Assembly and Controls
The oil burner assembly is the heart of your heating system. It has ignition controls, a fuel pump, and a combustion chamber where oil burns to create heat. The burner’s control system manages the heating process automatically.
Inside the burner assembly, you’ll find key parts. The fuel pump draws oil from the tank and pressurizes it for burning. Ignition electrodes spark the oil, and safety controls watch the flame and shut down if needed.
Regular oil burner maintenance keeps these parts working well. Clean electrodes ensure reliable ignition, and adjusted controls keep the system safe all season.
Fuel Tank and Supply Lines
Your fuel tank holds the heating oil for your system. Most tanks hold 275 to 330 gallons, lasting weeks in winter. The tank connects to the burner through supply lines and filters.
Supply lines carry oil to the burner. They have shut-off valves and filters to remove impurities. A fuel gauge on your tank shows how much oil is left, helping you plan for deliveries.
Keeping the fuel system clean prevents many heating problems. Clean filters ensure steady oil flow, and leak-free lines keep the system safe and efficient.
Heat Exchanger and Distribution System
The heat exchanger captures heat from combustion and transfers it to your home’s distribution system. It keeps the hot gases separate from the air or water that carries heat. Clean and crack-free heat exchangers are essential for safe, efficient operation.
Your distribution system moves heated air or water to different rooms. Forced air systems use ductwork and blowers, while hydronic systems pump hot water through radiators or baseboard units. Both need regular maintenance for best performance.
Knowing how these systems work together helps you spot issues early. Strange noises, uneven heating, or unusual odors often mean problems with specific parts. This knowledge lets you do basic maintenance safely and know when fuel oil furnace repair needs a pro.
Essential Safety Precautions Before Starting Repairs
Before you start working on your oil heating system, we must set up important safety steps. Your safety and your family’s wellbeing must always come first, no matter the repair’s complexity or cost savings. Oil heating systems use flammable fuels, electrical parts, and high temperatures. These need respect and careful preparation.
Following safety protocols is key. Every year, accidents happen when homeowners skip important steps or try repairs they’re not ready for.
Shutting Off Power and Fuel Supply
Always disconnect both electrical power and fuel supply before starting any work. Find your oil heating system’s main electrical disconnect switch, usually near the furnace or boiler. Turn off the circuit breaker that controls your heating system at your home’s main electrical panel.
Next, shut off the fuel supply at the oil tank valve. This red valve should turn clockwise to close completely. Never attempt repairs with active fuel flow, as even minor leaks can create dangerous situations.
Wait at least 10 minutes after shutting off power and fuel before starting any work. This cooling period allows components to reach safer temperatures and reduces accident risk.
Proper Ventilation and Fire Safety
Make sure your work area has good ventilation before starting repairs. Open windows and doors to create airflow, as heating oil vapors can accumulate in enclosed spaces. These vapors are heavier than air and settle in low areas, creating hazards.
Keep a Class B fire extinguisher within easy reach of your work area. Never smoke, use open flames, or operate spark-producing tools near heating oil or fuel lines. Even small static electricity sparks can ignite oil vapors under certain conditions.
“The best safety measure is preparation. Taking time to secure your work environment prevents 90% of heating system accidents.”
Recognizing When to Stop DIY Repairs
We strongly encourage homeowners to recognize their limits and know when professional help is necessary. Some repairs require specialized training and equipment that only licensed technicians possess.
Contact an emergency furnace technician immediately if you encounter any of these warning signs:
- Strong oil odors or visible fuel leaks
- Electrical sparking or burning smells
- Cracked heat exchangers or combustion chambers
- Complex control system malfunctions
- Gas or carbon monoxide detection
The following table outlines safe DIY tasks versus situations requiring professional intervention:
| Safe DIY Tasks | Professional Required | Emergency Situations |
|---|---|---|
| Filter replacement | Electrical wiring repairs | Gas leaks detected |
| Thermostat battery changes | Fuel line modifications | Strong oil odors |
| Basic cleaning tasks | Combustion chamber work | Carbon monoxide alarms |
| Visual inspections | Heat exchanger repairs | Electrical sparking |
Remember, calling an emergency furnace technician when safety concerns arise protects your investment and your family. Professional expertise costs far less than property damage or personal injury. Companies like Dupuis Energy provide 24-hour emergency services for situations that homeowners can’t handle.
Step 1: Diagnosing No Heat Problems
Before you call for help, check these basic parts that often cause heating issues. Most heating problems are simple and can be fixed quickly. This way, you save time and money and get your heat back faster.
Begin by checking the most common areas first. About 70% of heating problems are in these three spots. Each check takes just a few minutes and can show you the problem.
Checking Thermostat Settings and Batteries
Your thermostat controls your heating system. Make sure it’s set to “heat” mode and the temperature is higher than the room’s by at least 5 degrees.
Many thermostats use batteries that can run out without warning. Dead batteries can stop your system from working even if everything else is fine. Change batteries every year or when the display gets dim.
Look for loose wires behind the thermostat. Gently wiggle the wires to make sure they’re tight.
Inspecting Circuit Breakers and Emergency Switches
Electrical problems often cause heating failures. First, check your main electrical panel for tripped circuit breakers. Look for breakers in the middle position between “on” and “off” – these are tripped.
Find emergency shut-off switches around your home. We usually find them near the furnace and sometimes at the top of basement stairs. Family members might accidentally turn these switches off, cutting power to your heating.
Press the reset button on your oil burner primary control once and listen. Never press it more than twice, as it can flood your combustion chamber with oil.
Verifying Fuel Oil Tank Levels
Running out of heating oil is more common than you think. Check your fuel gauge right away when you have no heat, and during long cold spells when you use more oil.
Fuel tank gauges show levels in fractions – 1/4, 1/2, 3/4, or full. If your gauge shows 1/4 or lower, get a delivery fast. Cold weather can make gauge readings seem higher than they are because oil contracts.
“We get more emergency calls during cold snaps because people don’t realize how much oil they use in extreme weather.”
If these simple steps don’t solve the problem, you might need a pro. 24 hour heating service providers are ready for urgent situations. They can handle complex electrical, mechanical, or fuel system problems that need special tools and skills.
Step 2: Troubleshooting Pilot Light and Ignition Issues
Ignition system failures can leave you without heat. But, many of these issues have simple fixes. It’s frustrating when your heating system won’t start, but most problems are easy to solve.
Before you start fixing, make sure your system has enough fuel and power. Check that your emergency switch is on and that your fuel tank is full. These steps help avoid unnecessary repairs.
Relighting Manual Pilot Lights Safely
Older oil heating systems often need manual pilot lights relit. We have essential safety steps for this.
First, find your system’s gas control valve and turn it off. Wait five minutes to let gas clear. This step prevents dangerous gas buildup.
Then, turn the valve to “pilot” and press the reset button. Light the pilot with a long lighter or match. Keep pressure on the reset button for 30-60 seconds after it lights to ensure the flame is right.
Cleaning Ignition Electrodes and Sensors
Dirty electrodes and sensors cause most ignition failures. They get soot and debris, stopping spark and flame detection.
Turn off power before cleaning. Remove the electrode assembly, noting its original position and gap. Clean the electrode tips with fine steel wool or emery cloth to remove carbon and corrosion.
Flame sensors need gentle cleaning with fine steel wool. Avoid harsh chemicals or abrasive materials that could damage them. Put everything back with the right gap, as the manufacturer says.
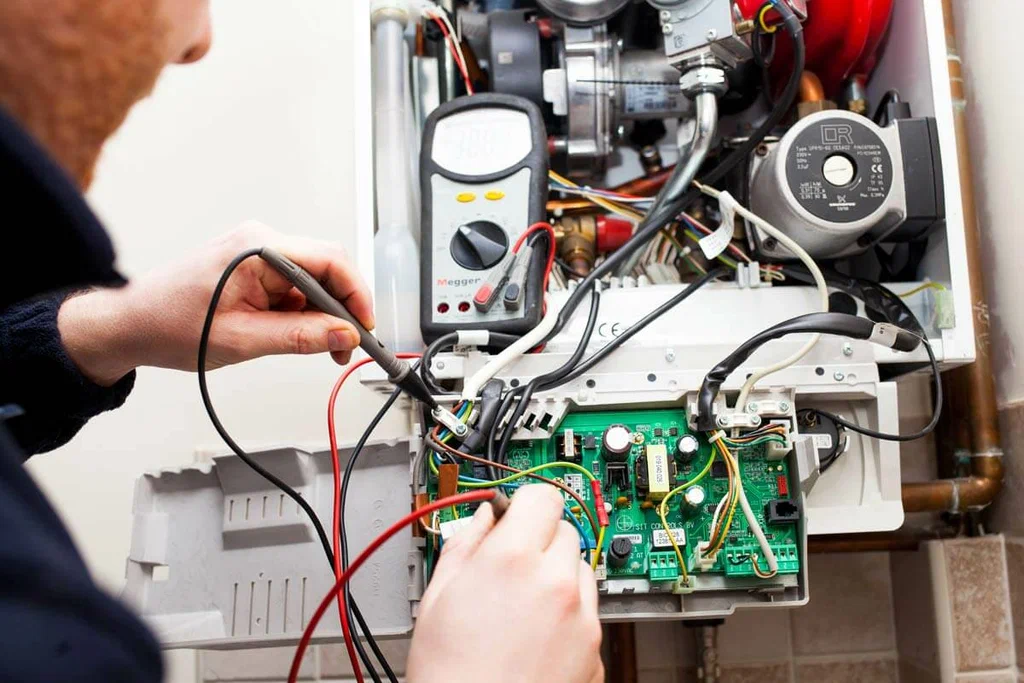
Testing Electronic Ignition Systems
Modern systems use electronic ignition controls that need special checks. These systems watch many safety factors and turn off if there’s a problem.
Testing these systems involves looking at control board indicators, checking safety switches, and making sure voltage is right. But, these steps need special tools and skills that most homeowners don’t have.
If cleaning electrodes doesn’t fix it, look at professional troubleshooting resources or call local hvac contractors. They have the tools and knowledge for complex repairs.
| Ignition Type | Common Problems | DIY Solutions | Professional Help Needed |
|---|---|---|---|
| Manual Pilot Light | Won’t stay lit, weak flame | Relighting, cleaning thermocouple | Gas valve replacement |
| Electronic Ignition | No spark, fault codes | Electrode cleaning, reset controls | Control board diagnosis |
| Hot Surface Igniter | Cracked igniter, no glow | Visual inspection only | Igniter replacement required |
| Flame Sensor | System shuts down after ignition | Sensor cleaning, connection check | Sensor replacement, wiring issues |
Step 3: Checking and Managing Fuel Oil Levels
Fuel-related heating problems are common but preventable. Proper fuel monitoring saves you from expensive repairs and cold nights. Learning to manage fuel levels ensures consistent heat in winter.
Heating oil tanks use simple gauges that need regular checks. Emergency fuel delivery services help when levels get too low. But, knowing how to maintain fuel lines can prevent many service calls.
Reading Oil Tank Gauges Accurately
Your oil tank gauge shows fuel levels in fractions. It has 1/4, 1/2, 3/4, and Full markings. Schedule delivery when it hits the 1/4 mark.
Never let your tank run completely empty. Running out can damage your oil pump. Check your gauge weekly during peak heating season to avoid outages.
Older tanks have stick gauges for manual measurement. Insert the stick fully into the tank and read the level. Clean the stick after each use for accuracy.
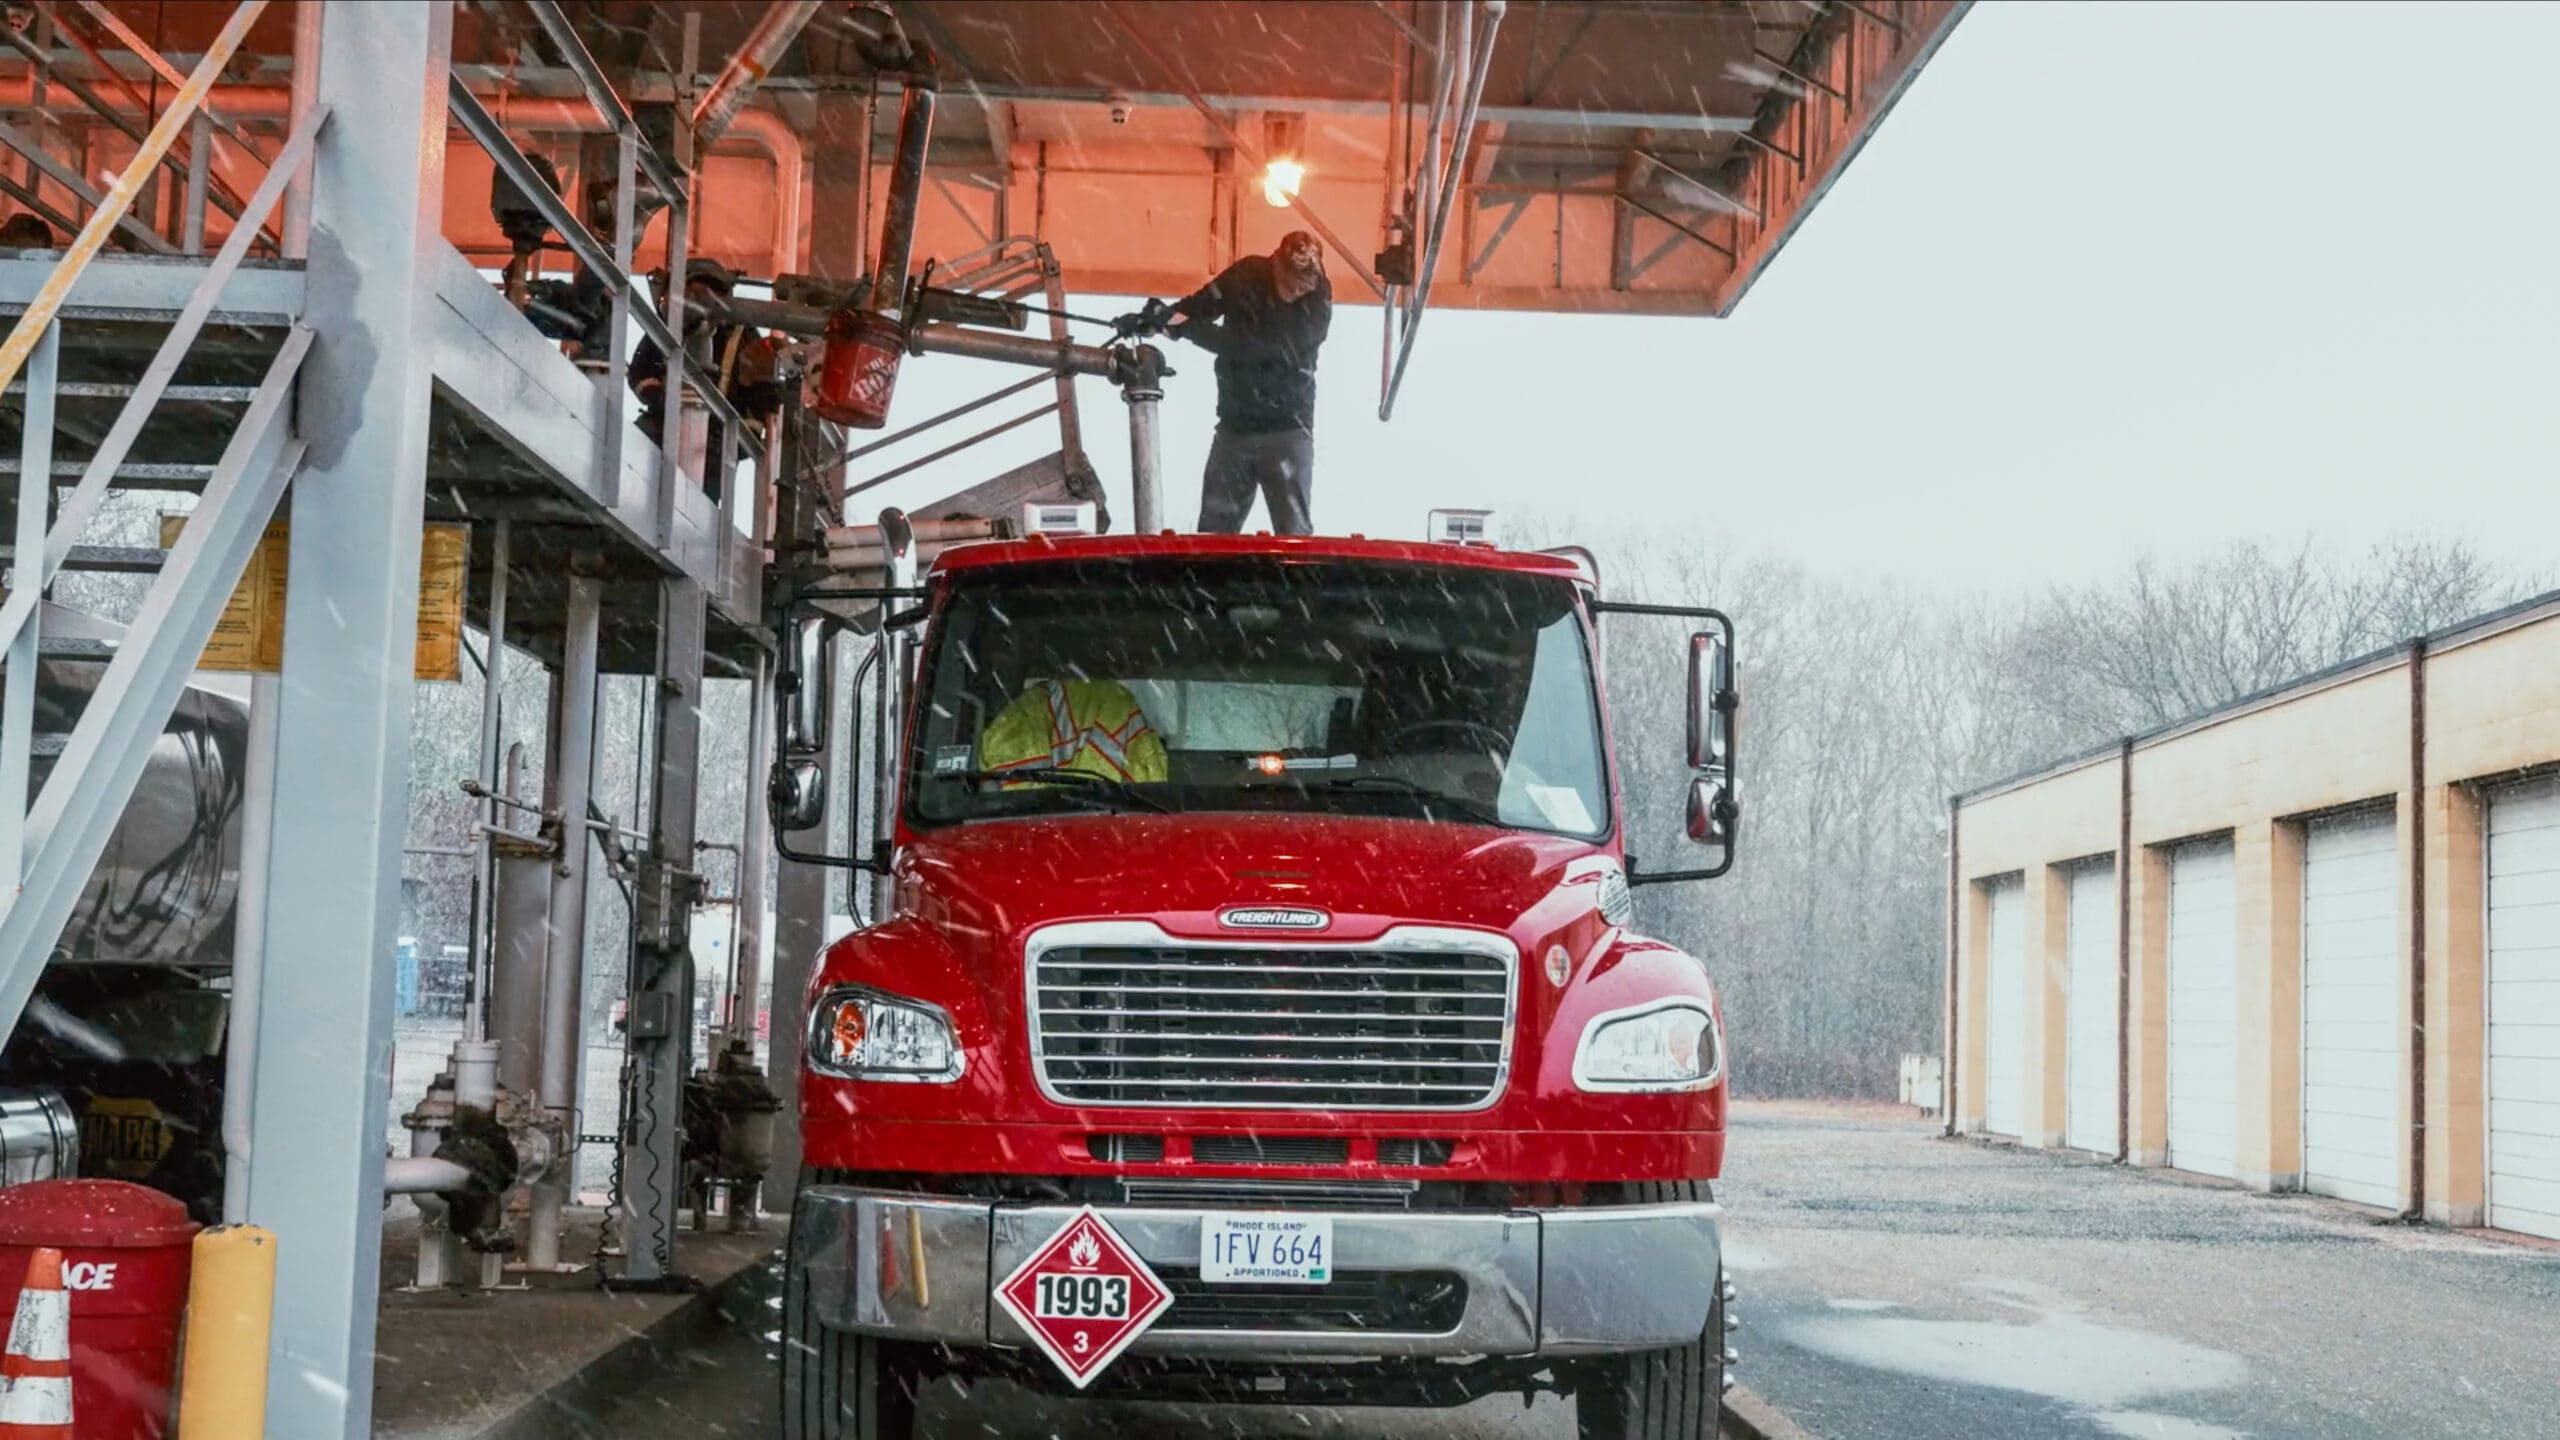
Scheduling Emergency Fuel Delivery
Emergency fuel delivery services offer same-day or next-day service. They charge extra for emergency deliveries, usually $50-100 more. Plan ahead to avoid these costs.
Contact your fuel supplier when your gauge drops below 1/8 full. Many offer automatic delivery programs. These programs prevent emergencies by scheduling deliveries before you run low.
Keep your supplier’s emergency contact handy. Some offer 24-hour service, while others only deliver during business hours.
Bleeding Air from Fuel Lines
Air gets into fuel lines when tanks run empty or during filter changes. This air stops your heating system. Bleeding air from fuel lines requires specific steps to fix.
Find the bleeder valve on your fuel pump. Start your heating system and slowly loosen the valve until fuel flows without air bubbles. Tighten the valve once fuel flows steadily.
Complex boiler systems may need professional help. Boiler repair specialists can safely address air problems. Call professionals if bleeding doesn’t work within 15 minutes.
| Fuel Level | Action Required | Timeline | Cost Impact |
|---|---|---|---|
| 3/4 Full | Monitor weekly | 4-6 weeks supply | Standard pricing |
| 1/2 Full | Schedule delivery | 2-3 weeks supply | Standard pricing |
| 1/4 Full | Order immediately | 1 week supply | Possible rush charges |
| 1/8 Full | Emergency delivery | 2-3 days supply | Premium emergency rates |
Step 4: Oil Filter Replacement and Fuel System Maintenance
Your oil heating system’s filter protects it from harmful contaminants. We suggest replacing it every year to keep fuel flowing well and avoid expensive fixes. Keeping the filter clean helps your system work better and last longer.
This important task is easy to do at home. You’ll need basic tools and follow some safety steps. It usually takes less than an hour to replace the filter.
Locating and Accessing Your Oil Filter
The oil filter is between the fuel tank and the burner. Most filters are on the wall near your heating unit or part of the fuel line. Look for a cylindrical canister with connections.
Common places for filters include:
- Wall-mounted near the oil burner
- Attached to the fuel pump assembly
- Inline within the fuel supply piping
- Inside a protective housing box
Clear the area around your filter before starting. Make sure you have good lighting and air for safety.
Complete Filter Replacement Process
Always shut off the fuel supply valve before starting. This keeps fuel from spilling and makes the job safer.
Here’s how to replace the filter:
- Turn off power to the heating system
- Close the fuel supply valve completely
- Place absorbent materials beneath the filter
- Remove the filter bowl using the appropriate wrench
- Dispose of old fuel and filter element properly
- Clean the filter bowl thoroughly
- Install new filter element and gasket
- Reassemble components with proper torque
Some fuel spillage is normal during this process. Have cleanup materials ready and work slowly to avoid mess.
Proper Disposal and System Testing
Used oil filters need special disposal. Never throw oil-contaminated filters in regular trash. Take them to recycling centers or automotive service centers.
After installing the new filter, bleed air from the fuel system. Press the reset button on your burner and watch for ignition. It might take a few cycles to get steady fuel flow.
Test your heating system for 15 minutes after replacing the filter. Listen for odd sounds and check for leaks.
Replacing the filter is simple, but reading heating company reviews helps find reliable pros for fuel system care. Many people choose professional help for complex tasks or annual tune-ups.
Step 5: Resolving Strange Noises and Vibrations
Strange sounds from your heating system can mean specific problems. We know these noises can worry you. But, many common heating system sounds have easy fixes. Knowing the difference between normal and problem noises helps keep your system running well.
Your oil heating system makes some sounds when it’s working right. You’ll hear the whoosh of ignition, a steady humming, and clicks from controls. But, grinding, squealing, or banging sounds mean you need to check things out fast.
Identifying Common Oil Burner Sounds
Different sounds from your heating system tell you about specific problems. We’ve made a detailed guide to help you understand what your system is saying through these sounds.
| Sound Type | Possible Cause | Action Required | Urgency Level |
|---|---|---|---|
| Squealing or Screeching | Dry blower motor bearings | Lubricate motor and fan | Moderate |
| Banging or Rattling | Loose ductwork or panels | Tighten connections and hardware | Low to Moderate |
| Grinding Noise | Worn burner motor components | Professional repair needed | High |
| Unusual Combustion Sounds | Burner adjustment issues | Professional diagnosis required | High |
Grinding noises or unusual combustion sounds need a pro’s help. These signs can mean serious mechanical issues that need expert care to avoid damage or safety risks.
Lubricating Blower Motors and Fans
Squealing sounds often mean blower motors or fans need oil. Many older heating systems have oil ports that need annual oiling with lightweight machine oil.
First, turn off power to your heating system at the main electrical panel. Find the oil ports on your blower motor. They’re usually small caps or plugs marked “OIL” on the motor housing.
Take off the oil port caps and add 3-5 drops of lightweight machine oil to each port. Avoid over-lubricating, as too much oil can harm motor parts. Put the caps back on and turn power back on to test the system.
Securing Loose Ductwork and Components
Banging or rattling sounds often come from loose ductwork or unsecured panels. These problems can be fixed with basic tools and a careful look.
Check all visible ductwork connections for loose joints or separated sections. Tighten duct clamps and secure any loose panels with the right screws or fasteners. Also, check the burner mounting and tighten any loose bolts.
But, vibrations from the heat exchanger area mean you should look for oil heat repair near me services right away. Heat exchanger problems need expert help and can be dangerous if not fixed right.
We suggest doing these noise checks every month during heating season. Spotting unusual sounds early can stop small problems from becoming big, expensive fixes. It keeps your family comfortable and safe.
Step 6: Addressing Poor Heat Distribution Issues
When some rooms stay cold while others overheat, the issue usually lies within your home’s heat distribution network. We often find that homeowners experience uneven heating not because of burner problems, but due to distribution system issues. Many of these problems can be resolved with basic adjustments and inspections.
Poor heat distribution wastes energy and creates uncomfortable living conditions. Before calling for fuel oil furnace repair services, you can perform several diagnostic steps. These simple checks often reveal the root cause of your heating problems.
Inspecting Ductwork for Blockages and Leaks
Start your inspection by examining visible ductwork throughout your home. Look for obvious blockages like debris, dust buildup, or objects that may have fallen into vents. Check that furniture isn’t blocking registers or return air vents.
Examine duct joints and connections for visible gaps or separations. These leaks can significantly reduce heating efficiency. You might notice loose tape, disconnected sections, or damaged insulation around ducts.
Feel around duct connections for air leaks while your system runs. Escaping warm air indicates problems that need attention. Professional fuel oil furnace repair technicians can seal these leaks properly, but you can temporarily address small gaps with appropriate duct tape.
Pay special attention to ductwork in crawl spaces, basements, and attics. These areas often contain the most problematic leaks. Cold air infiltration in these spaces can dramatically reduce your system’s effectiveness.
Adjusting Zone Dampers and Registers
Many homes have zone dampers located in main trunk lines that control airflow to different areas. These dampers can be opened or closed to redirect heated air where it’s needed most. Look for lever handles or wing nuts on rectangular ducts.
Adjust dampers gradually while monitoring temperature changes in affected rooms. Opening dampers increases airflow to specific zones, while closing them redirects air elsewhere. Make small adjustments and allow time for temperature changes.
Check individual room registers for proper operation. These adjustable vents should open and close smoothly. Clean any dust or debris that might restrict airflow. Ensure registers point toward the center of rooms.
Balance your system by partially closing registers in overheated rooms and fully opening them in cold areas. This process requires patience and fine-tuning. Proper system operation depends on achieving the right airflow balance throughout your home.
Testing Circulator Pumps in Boiler Systems
Hot water boiler systems rely on circulator pumps to move heated water through radiators or baseboard units. When these pumps fail, you’ll notice uneven heating or complete loss of heat in certain zones.
Listen for pump operation when your boiler runs. You should hear a gentle humming sound from the pump motor. Complete silence may indicate pump failure, while loud grinding or squealing suggests mechanical problems.
Feel pipes leaving your boiler while the system operates. Warm pipes indicate proper circulation, while cold pipes suggest pump problems. Check multiple zones if your system has several circulator pumps.
Examine pump connections for leaks or corrosion. Small leaks can cause air infiltration that reduces pump efficiency. Professional fuel oil furnace repair services can replace failed pumps and address complex circulation issues.
| Distribution Problem | Common Symptoms | DIY Solutions | Professional Help Needed |
|---|---|---|---|
| Blocked Ductwork | Reduced airflow, cold rooms | Remove visible debris, clean vents | Deep cleaning, major blockages |
| Duct Leaks | High energy bills, uneven heating | Seal small gaps with duct tape | Comprehensive duct sealing |
| Damper Issues | Poor zone control, temperature imbalance | Adjust damper positions manually | Motorized damper repairs |
| Pump Failure | No heat in specific zones | Check electrical connections | Pump replacement, system bleeding |
While homeowners can perform basic adjustments and visual inspections, persistent distribution problems often require professional intervention. Fuel oil furnace repair specialists have the tools and expertise to diagnose complex airflow issues.
Complex problems like undersized ductwork, improper system design, or failed zone controls need professional attention. We recommend scheduling service when DIY efforts don’t resolve your heating distribution issues within a reasonable timeframe.
Advanced Oil Burner Maintenance and Cleaning
Advanced oil burner maintenance needs special knowledge and tools. Most homeowners don’t have these. It involves working with dangerous materials and precise parts.
It’s best to let licensed technicians handle these tasks. They have the right training, safety gear, and tools for the job.
Cleaning Combustion Chamber and Heat Exchanger
The combustion chamber and heat exchanger get dirty over time. This dirt lowers efficiency and can be dangerous.
Professionals use special brushes and vacuums to clean them. They wear protective gear and know how to safely dispose of waste.
Trying to clean without the right tools can be risky. It can also damage expensive parts. The cleaning must be done carefully to avoid damaging the heat exchanger.
Replacing Burner Nozzles and Electrodes
Burner nozzles affect how well the system works. Wrong nozzles can be dangerous and lower performance.
Technicians use precise tools to install nozzles correctly. They choose the right size based on your system’s needs.
| Component | Replacement Frequency | Professional Tools Required | Safety Considerations |
|---|---|---|---|
| Burner Nozzle | Annually | Torque wrench, nozzle gauge | Fuel system pressure |
| Ignition Electrodes | 2-3 years | Gap gauge, insulation tester | High voltage components |
| Oil Filter | Annually | Filter wrench, vacuum pump | Fuel contamination |
| Combustion Chamber | 2-5 years | Refractory cement, forming tools | High temperature materials |
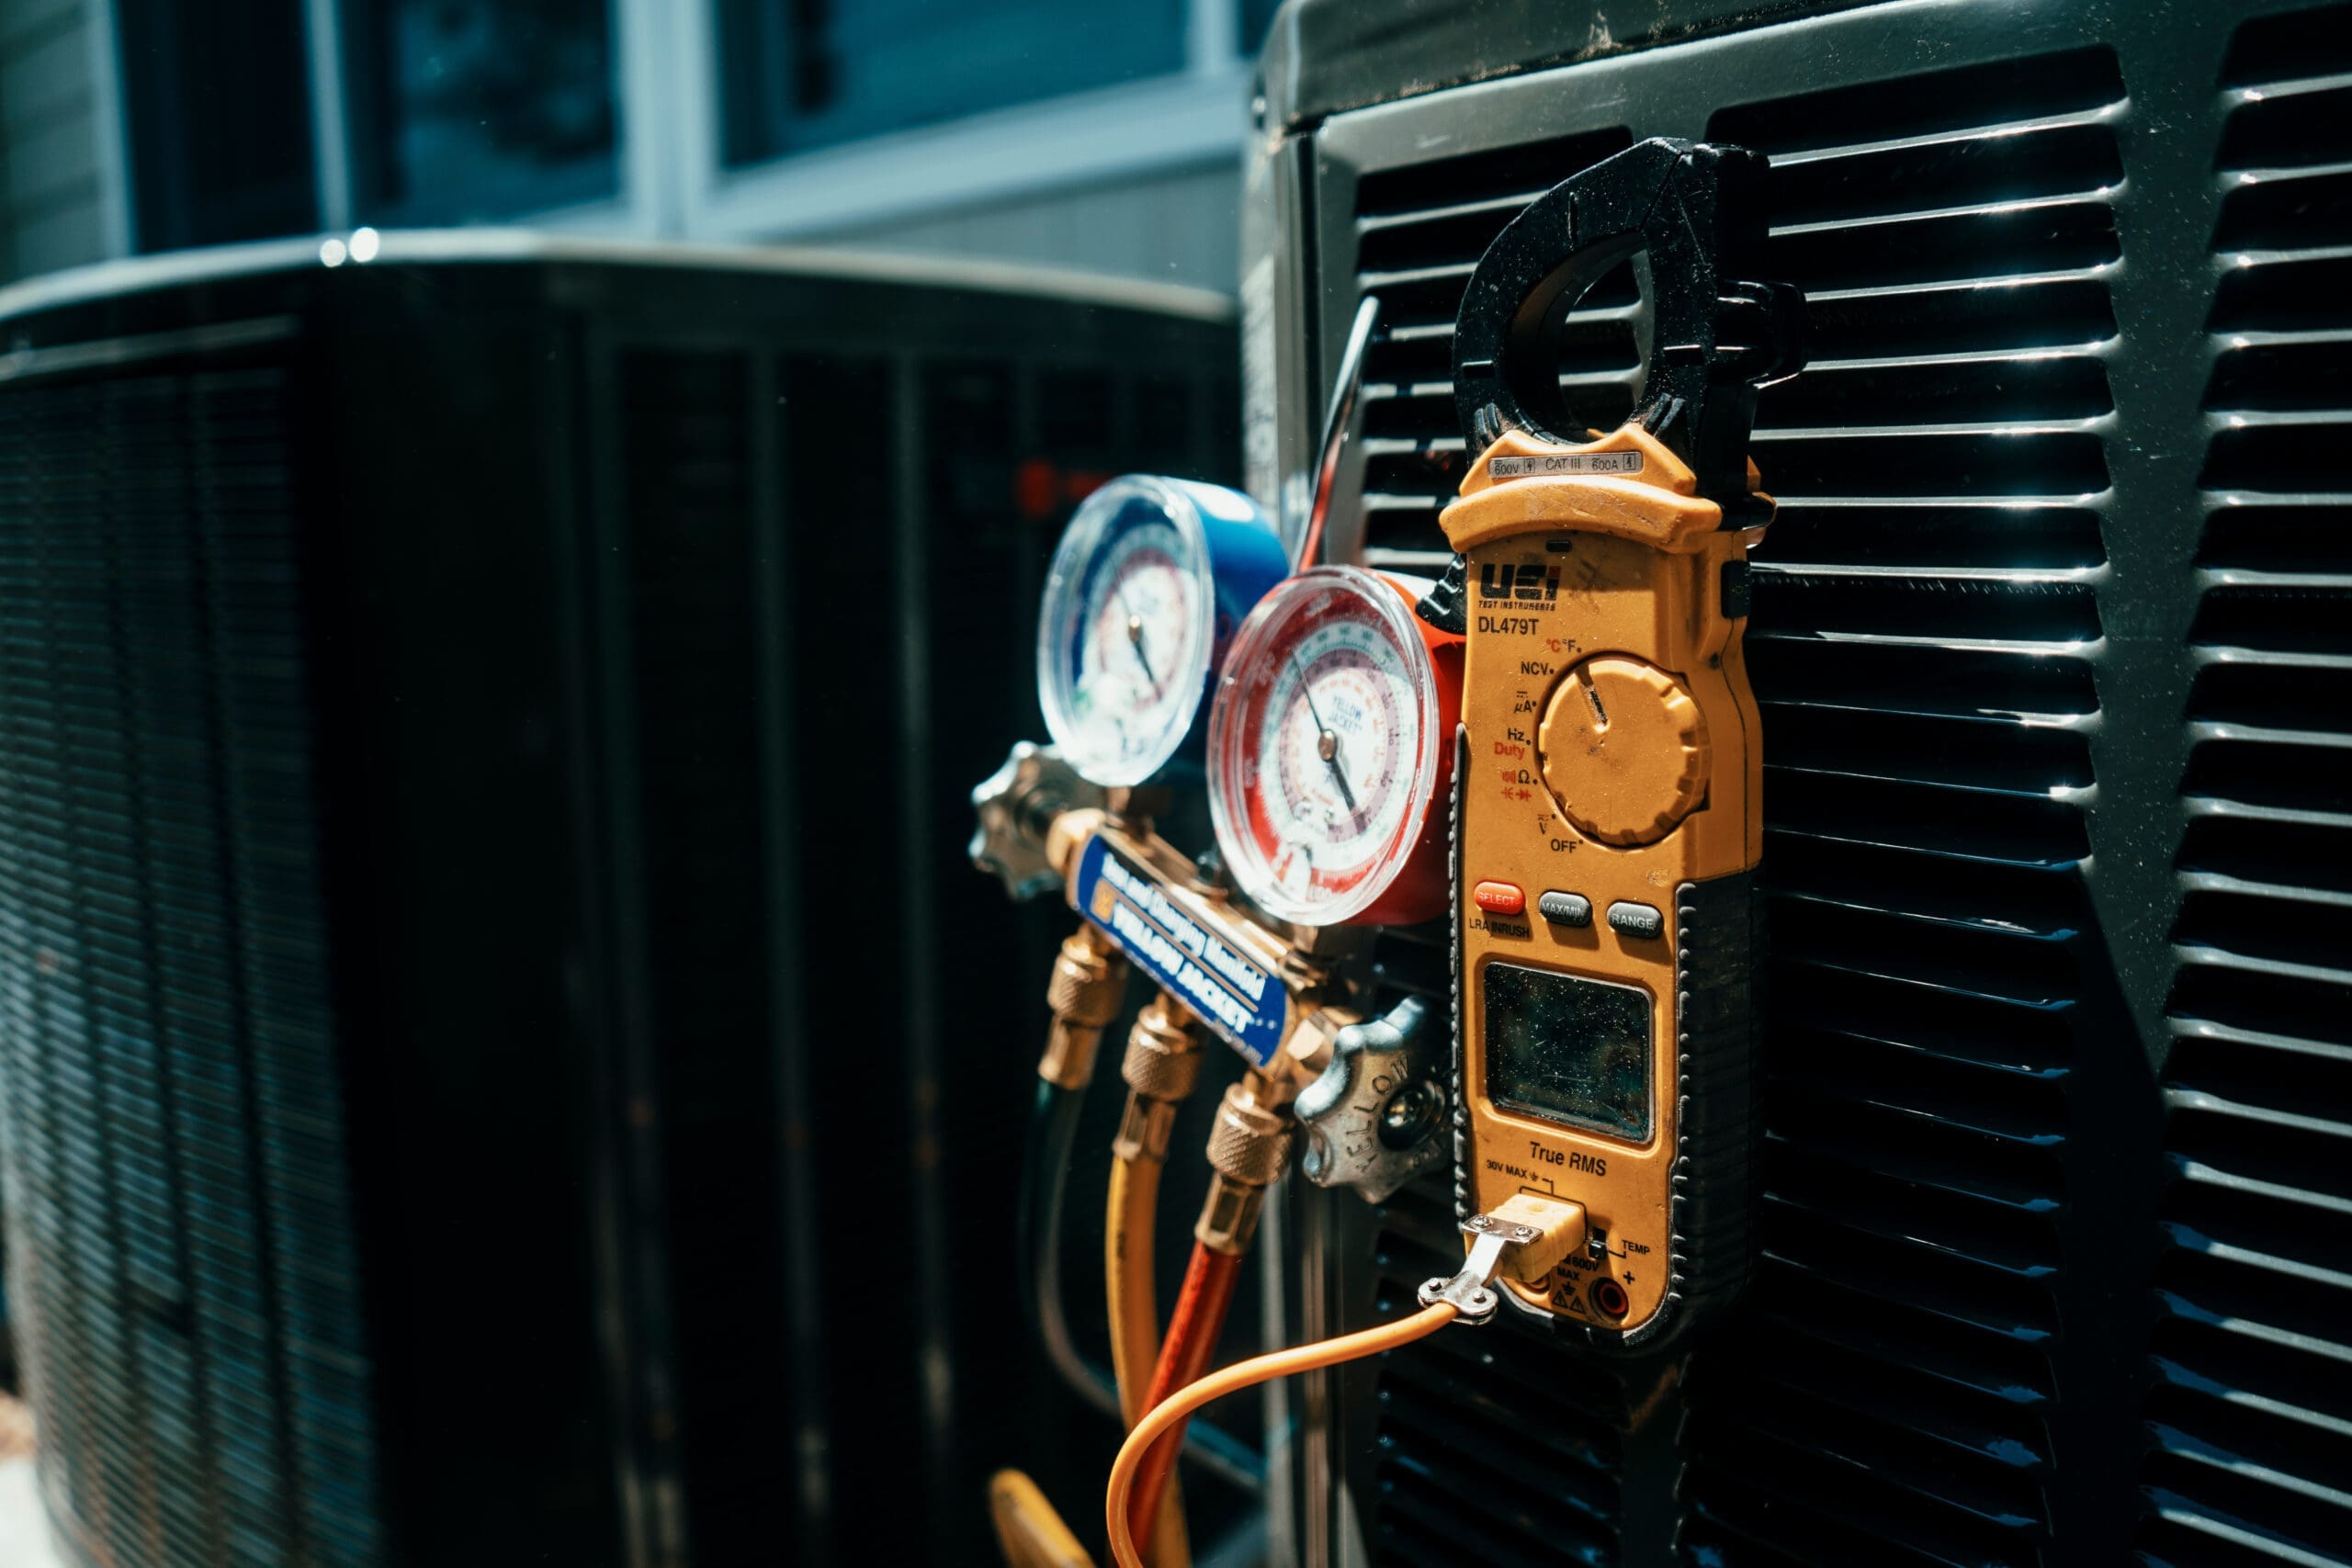
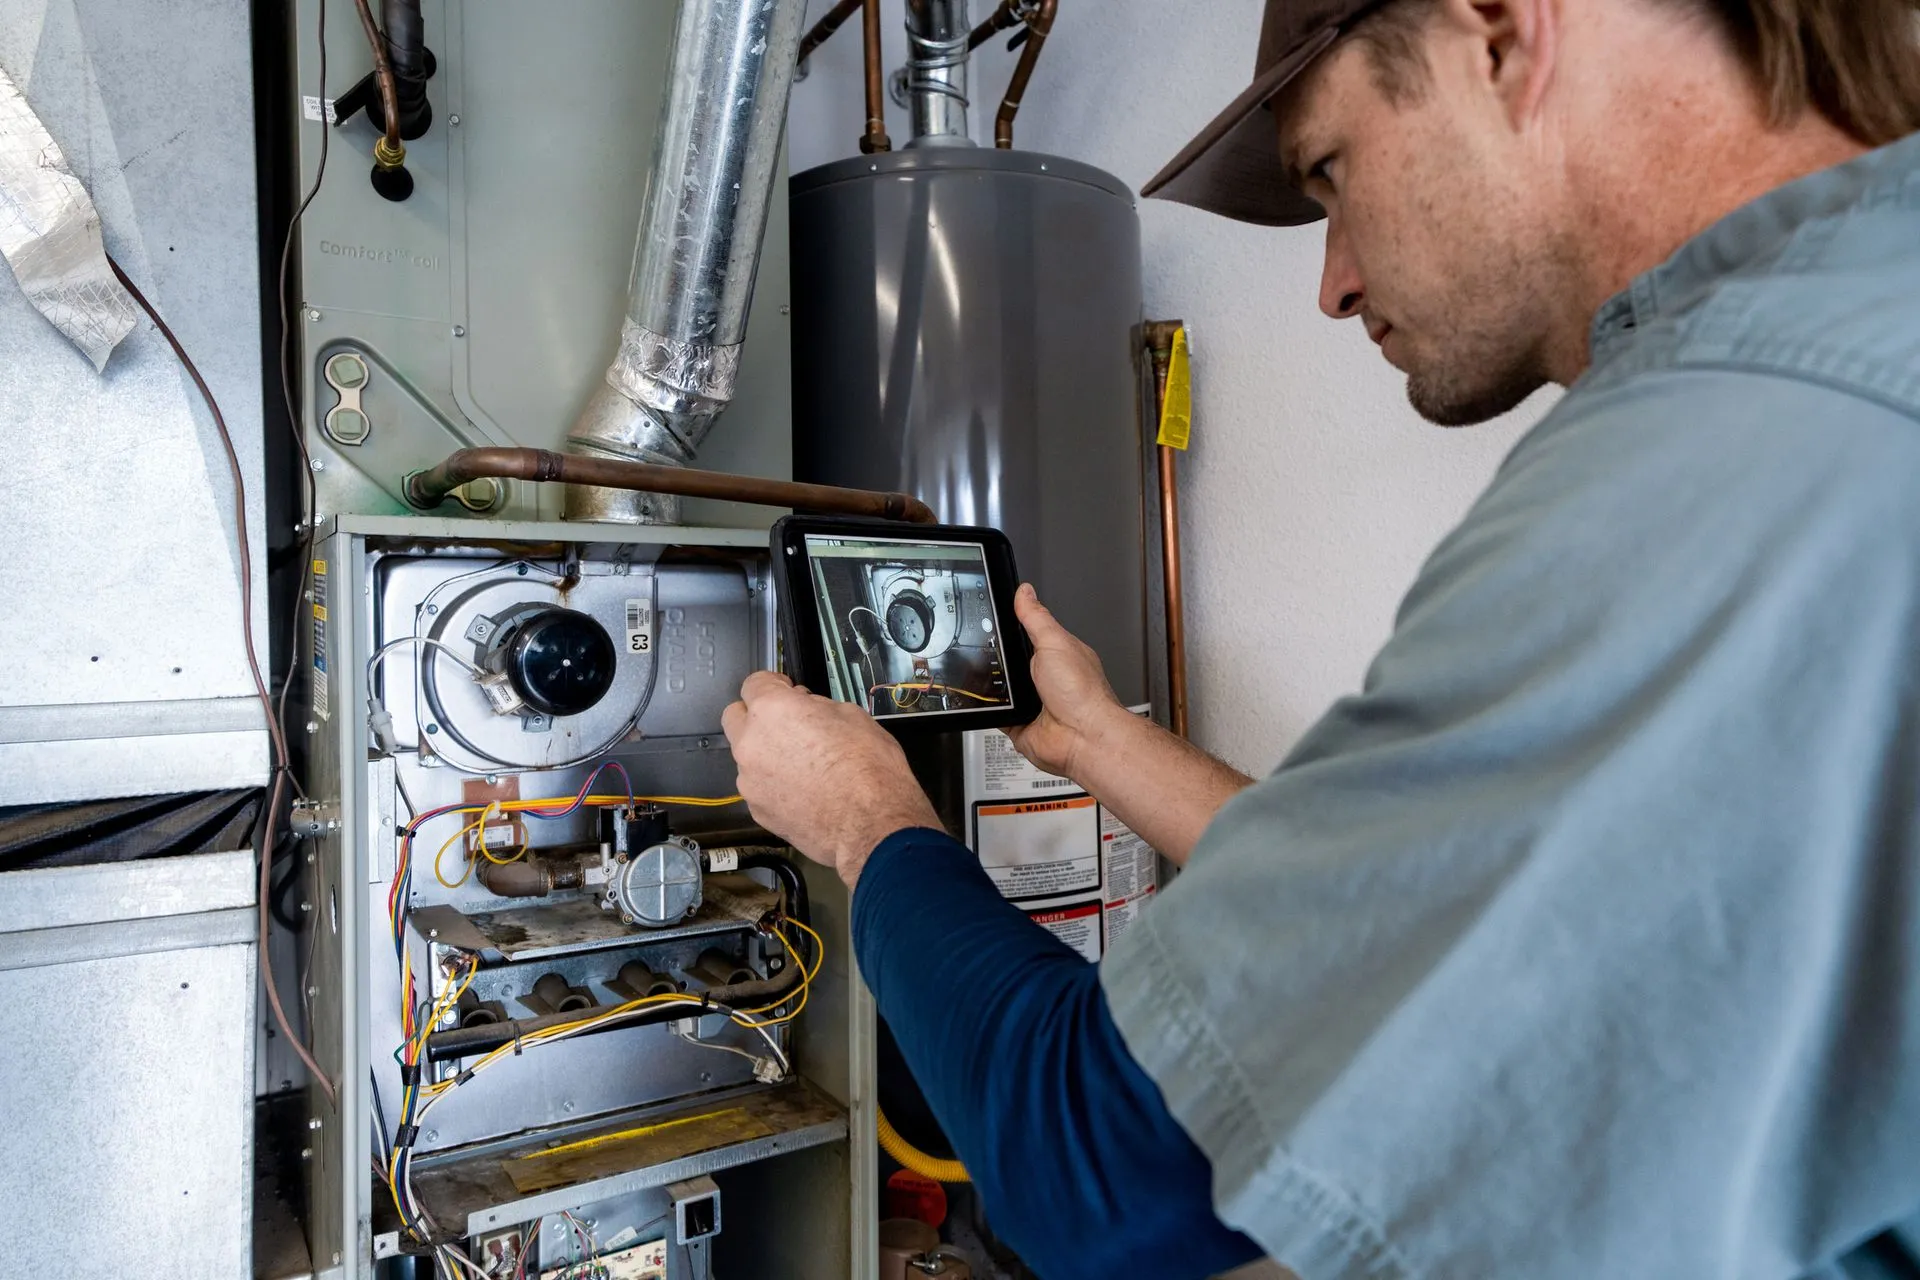
Annual Efficiency and Emissions Testing
Efficiency tests use advanced equipment. It checks oxygen levels, carbon monoxide, and efficiency.
Technicians use this data to adjust settings. This ensures safe and efficient operation.
Annual maintenance boosts efficiency by 5-15%. It also spots safety issues early.
This testing finds problems that homeowners can’t. It also includes system checks to prevent failures and dangers.
Book annual oil burner maintenance for safety and efficiency. Licensed technicians have the skills and tools for these tasks.
When to Contact Oil Heat Repair Near Me Services
Some heating problems need quick help from experts. This keeps your family safe and your heating system working right. Experts have the tools and know-how to fix complex issues safely and well.
Some issues are too hard for DIY fixes. Experts can find and fix problems that meet safety and quality standards.
Complex Electrical and Control System Problems
Electrical issues in oil heating systems need special tools and skills. Faulty control boards, damaged relays, and wiring problems can be dangerous if not fixed right.
Experts use special tools to find and fix electrical problems safely. They know how to replace parts without risking harm or damage.
Fixing control system failures is tricky. Trying to fix it without the right training can make things worse and void warranties.
Heat Exchanger Cracks and Safety Issues
Damage to the heat exchanger is a big safety risk. Cracks let carbon monoxide into your home, which is very dangerous.
Look out for rust, strange smells, or metal cracks. If you see these signs, turn off your system and call for help.
Fixing the heat exchanger needs special skills and safety training. Only certified pros should do this job to ensure it’s done right.
Emergency Furnace Technician Situations
Some problems need help right away to avoid damage or danger. Strong fuel smells, visible leaks, or carbon monoxide alarms are emergencies.
We’re here 24/7 because heating problems don’t wait. Our skilled team works fast to get your home warm and safe again.
When looking for oil heat repair, choose companies with the right licenses and emergency services. Good heating contractors have the parts and tools needed for quick fixes.
| Emergency Situation | Immediate Action | Professional Response Time | Safety Priority |
|---|---|---|---|
| Strong fuel odors | Shut off system, ventilate area | Within 2 hours | Fire prevention |
| Carbon monoxide alarm | Evacuate home immediately | Emergency dispatch | Life safety |
| Visible fuel leaks | Turn off fuel supply | Within 4 hours | Environmental protection |
| No heat in freezing weather | Check basic settings | Same day service | Pipe freeze prevention |
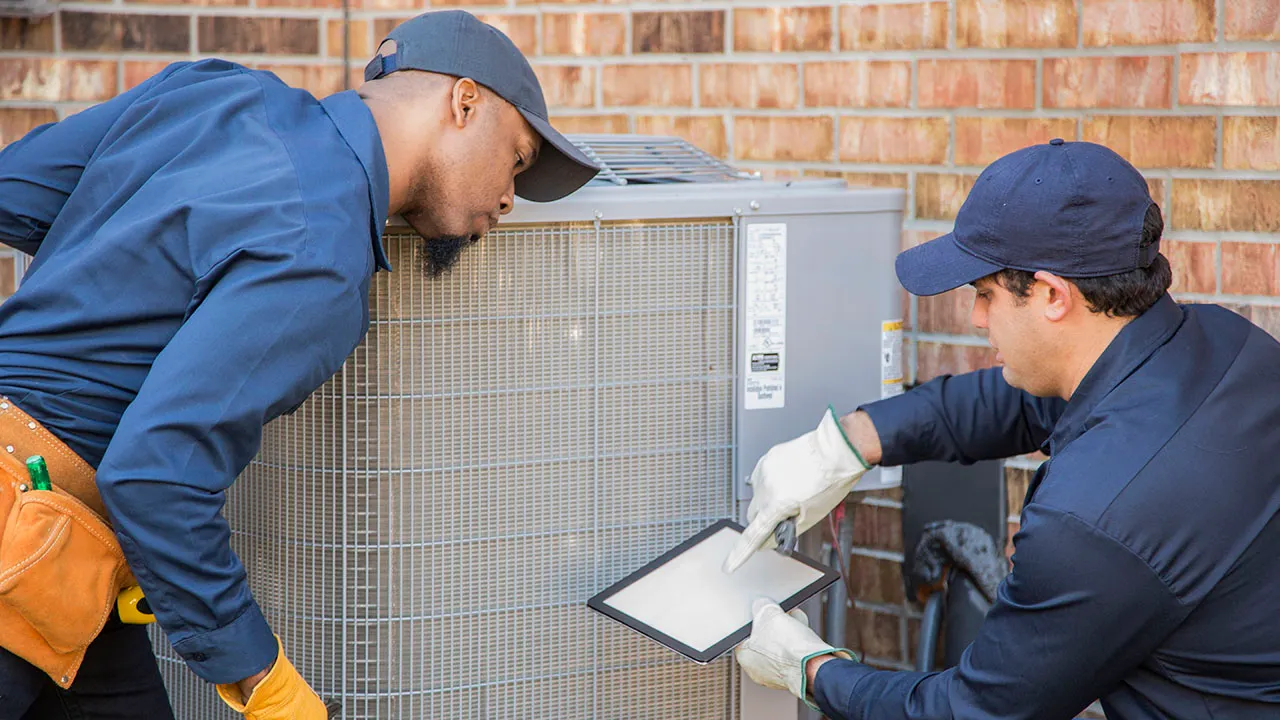
Professional repair services have the skills and tools to solve problems right. They fix issues safely, keeping your system working well and lasting longer.
Finding Reliable Local HVAC Contractors
When your heating system needs help, picking the right contractor is key. Finding local hvac contractors can be tough, but it’s even harder in emergencies. It’s important to do your research and ask the right questions.
Good contractors have the right licenses, insurance, and certifications. Companies like Dupuis Energy show the level of expertise you should look for. Long-standing presence in the community often means they’re reliable and make customers happy.
Researching Company Reviews and Credentials
Start by looking at heating company reviews on Google, Better Business Bureau, and Angie’s List. Look for comments on how fast they respond, the quality of their work, and how they handle problems.
Make sure contractors are licensed and insured. Ask about manufacturer certifications, which show they’re up-to-date with the latest tech. Certified technicians know the latest in equipment and repair methods.
Ask for references from recent customers with similar systems. It’s a good idea to talk to at least three people to get a full picture of the contractor’s work.
Verifying Emergency Service Availability
True 24 hour heating service means real technicians are available, not just answering services. Ask about their emergency response times and if they’re available after hours.
Find out if they work on weekends and holidays. Some charge more for emergency calls, so it’s good to know the cost upfront. Reliable emergency service can stop small problems from becoming big ones.
Call them during off-hours to see how fast they respond. This shows how committed they are to their customers.
Comparing Specialist Quotes and Services
For hydronic systems, look for boiler repair specialists with the right training. They know how to take care of and fix water-based heating systems.
When comparing prices, look at more than just the cost. Check the warranty, parts quality, and the contractor’s reputation. Comprehensive warranties show the contractor’s confidence in their work.
Ask about service agreements and maintenance plans. These often include priority service and cheaper repairs. We think regular maintenance can save you money and keep your system running well.
Ask for detailed estimates that show all costs. This way, you can make a smart choice and avoid unexpected expenses.
Creating a Preventive Maintenance Schedule
A good preventive maintenance schedule is like insurance for your heating system. It prevents 80% of common heating failures and makes your system last longer. Professional maintenance keeps your system running well and saves energy.
Regular maintenance turns expensive repairs into manageable costs. Your oil heating system needs regular checks to work safely and efficiently. Create a detailed maintenance plan that includes both your tasks and professional services.
Monthly Homeowner Heating System Troubleshooting Checks
Do monthly checks on your heating system to catch problems early. These quick checks can save you from big system failures. They take less than 30 minutes and are very important.
Check your thermostat and battery levels every month. Turn your thermostat up and down to see if it works. Change the batteries once a year or when the low battery light comes on.
Check your fuel oil tank gauge every month to avoid running out of fuel. Listen for strange sounds like grinding or squealing when your system turns on. Also, check for leaks around your tank and burner.
Look at your ductwork for loose connections or damage. Check for oil leaks around your tank, lines, and burner. Note any changes in how your system works or if you smell something odd.
Seasonal Professional Fuel Oil Furnace Repair Inspections
Get professional inspections in the fall and spring to keep your system in top shape. These inspections are important and should be done by experts.
Fall inspections check how well your system burns fuel and test safety systems. Technicians clean your system, test controls, and check for leaks. They also look for damage to heat exchangers.
Spring inspections check for wear and tear and plan repairs for when you’re not using your system. Technicians check your burner, filters, and moving parts. They also clean or replace filters.
Professional inspections also check how efficient your system is. Certified technicians use special tools to measure how well your system burns fuel and what it emits. This helps them know when it’s time to replace parts or upgrade your system.
Long-term System Efficiency Upgrades
Upgrading your system can save you money and make your home more comfortable. Look at upgrade options during maintenance visits. Upgrades can cut fuel use by 15-25% and make your system last longer.
Programmable thermostats save energy by controlling temperature better. New thermostats let you control different areas of your home. They adjust temperature based on when you’re home and the weather outside.
New burners improve how well your system burns fuel. They use less fuel and can get rebates or tax breaks. Professional installation ensures they work best.
Zone control systems let you set different temperatures in different areas. This saves energy in unused rooms. Professional installation is key for the best performance.
| Maintenance Task | Frequency | Performed By | Key Benefits |
|---|---|---|---|
| Thermostat and fuel level checks | Monthly | Homeowner | Early problem detection |
| Combustion analysis and cleaning | Fall/Spring | Professional | Safety and efficiency |
| Filter replacement and lubrication | Seasonal | Professional | System longevity |
| Efficiency upgrades evaluation | Annual | Professional | Cost reduction |
Work with qualified contractors to create a maintenance plan that fits your system and needs. Regular maintenance keeps your system running well and saves you money. Preventive maintenance is the smartest way to own a heating system.
Conclusion
We think effective heating system troubleshooting starts with knowing your equipment and staying safe. This guide has given you the tools to tackle common oil heating issues. It also shows when you need a pro’s help.
Your heating system works best with a mix of care. Do regular checks, change filters, and get professional inspections. Simple fixes can solve many problems, saving you money and time when it’s cold.
Safety is always first in repairs. If you face complex electrical issues or heat exchanger problems, get help from experts. They have the skills and tools for safe fixes.
Having good relationships with local HVAC pros is key. They offer the knowledge, tools, and safety steps to protect your home and family.
Regular maintenance stops most heating problems. Check your system monthly, get seasonal inspections, and fix any odd sounds or performance issues. This keeps your oil heating system efficient for years.
Investing in regular maintenance and knowing how to troubleshoot pays off. It makes your system reliable, efficient, and gives you peace of mind during the cold months.
FAQ
What should I check first when my oil heating system isn’t producing heat?
Start with the basics. Make sure your thermostat is set to “heat” and the temperature is higher than the room. Replace batteries if needed and check for tripped circuit breakers. Look for emergency shut-off switches that might be turned off.
How do I safely relight a pilot light on my oil heating system?
FAQ
What should I check first when my oil heating system isn’t producing heat?
Start with the basics. Make sure your thermostat is set to “heat” and the temperature is higher than the room. Replace batteries if needed and check for tripped circuit breakers. Look for emergency shut-off switches that might be turned off.
How often should I replace my oil filter and how do I do it?
FAQ
What should I check first when my oil heating system isn’t producing heat?
Start with the basics. Make sure your thermostat is set to “heat” and the temperature is higher than the room. Replace batteries if needed and check for tripped circuit breakers. Look for emergency shut-off switches that might be turned off.
What strange noises from my oil burner should concern me?
FAQ
What should I check first when my oil heating system isn’t producing heat?
Start with the basics. Make sure your thermostat is set to “heat” and the temperature is higher than the room. Replace batteries if needed and check for tripped circuit breakers. Look for emergency shut-off switches that might be turned off.
How do I know if I need emergency furnace technician services?
FAQ
What should I check first when my oil heating system isn’t producing heat?
Start with the basics. Make sure your thermostat is set to “heat” and the temperature is higher than the room. Replace batteries if needed and check for tripped circuit breakers. Look for emergency shut-off switches that might be turned off.
What’s involved in bleeding air from fuel lines after running out of oil?
FAQ
What should I check first when my oil heating system isn’t producing heat?
Start with the basics. Make sure your thermostat is set to “heat” and the temperature is higher than the room. Replace batteries if needed and check for tripped circuit breakers. Look for emergency shut-off switches that might be turned off.
How can I find reliable 24 hour heating service in my area?
FAQ
What should I check first when my oil heating system isn’t producing heat?
Start with the basics. Make sure your thermostat is set to “heat” and the temperature is higher than the room. Replace batteries if needed and check for tripped circuit breakers. Look for emergency shut-off switches that might be turned off.
What maintenance tasks can I safely perform myself versus what requires professionals?
FAQ
What should I check first when my oil heating system isn’t producing heat?
Start with the basics. Make sure your thermostat is set to “heat” and the temperature is higher than the room. Replace batteries if needed and check for tripped circuit breakers. Look for emergency shut-off switches that might be turned off.
How do I troubleshoot uneven heating throughout my home?
FAQ
What should I check first when my oil heating system isn’t producing heat?
Start with the basics. Make sure your thermostat is set to “heat” and the temperature is higher than the room. Replace batteries if needed and check for tripped circuit breakers. Look for emergency shut-off switches that might be turned off.
What should I include in a preventive maintenance schedule?
FAQ
What should I check first when my oil heating system isn’t producing heat?
Start with the basics. Make sure your thermostat is set to “heat” and the temperature is higher than the room. Replace batteries if needed and check for tripped circuit breakers. Look for emergency shut-off switches that might be turned off.
When should I consider calling boiler repair specialists versus general HVAC contractors?
FAQ
What should I check first when my oil heating system isn’t producing heat?
Start with the basics. Make sure your thermostat is set to “heat” and the temperature is higher than the room. Replace batteries if needed and check for tripped circuit breakers. Look for emergency shut-off switches that might be turned off.
How do I properly read my oil tank gauge to avoid running out of fuel?
FAQ
What should I check first when my oil heating system isn’t producing heat?
Start with the basics. Make sure your thermostat is set to “heat” and the temperature is higher than the room. Replace batteries if needed and check for tripped circuit breakers. Look for emergency shut-off switches that might be turned off.
Call Dupuis Energy now at (401) 262-8006 or send us a message online.